How to set up a Virtual Screen
1. Once we've selected the mesh where the video will be played, we need to find the appropriate texture within the corresponding "Material slot".
-
Click on the mesh ("ScreenC" in this case).
-
Click on "None" to open the list of materials and search for the appropriate material (in this case "Material 0").

2. We need to activate the "As virtual screen" box to access some advanced settings.

3. We can assign different types of sources:
- [[Still Image]]
- [[Internal]]
- [[External]]
- [[Image Sequences]]
4. [[STILL IMAGE]]
- Scroll down the menu until you find the "Screen Parameters Editor" module and choose "Still Image" in the source.
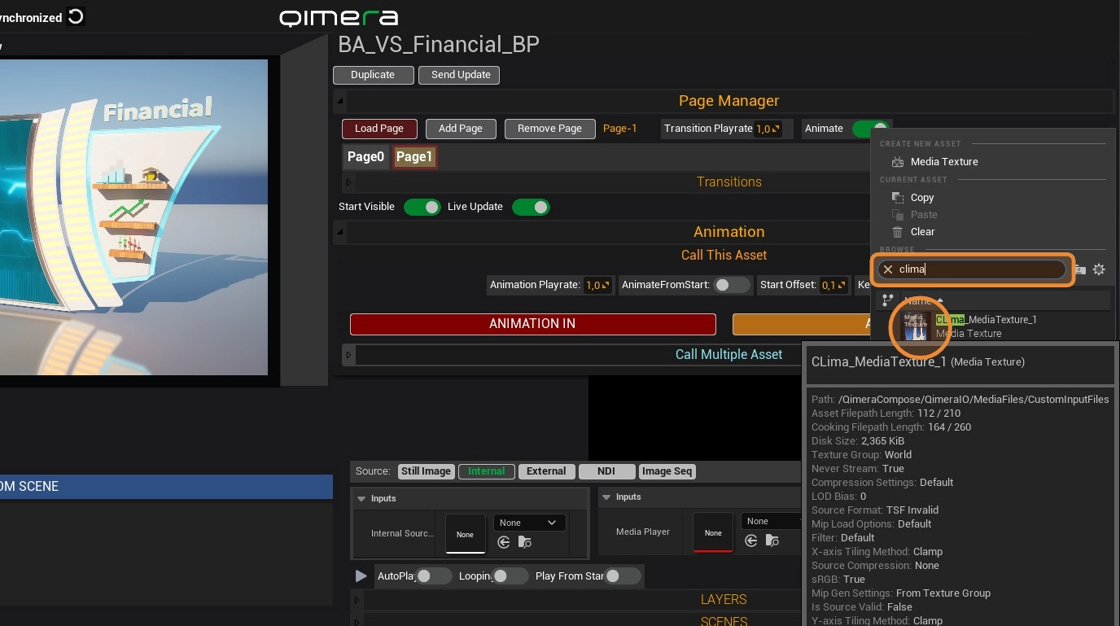
- [[Click on ]]"None" in the "Texture Input" search bar.
- When the menu of all the textures in the project appears, [[select]] the desired one.

5. Once you have chosen the texture, [[click on]] "Load Page" to load the texture (make sure "Live Update" is [[turned on]] to see the changes in real time).

6. We can access several parameters to fine-tune our image.
-
Tiling
-
Move
-
Color Luminance
-
Material Modes
If we change the "Shading Model" from "Unlit" to "Lit", our screen will not be affected by the lights in the virtual space.
-
Mesh Options
We can also activate "Sharp" to achieve better video quality.

Tip: We can add different pages to assign different source types.
7. [[INTERNAL]]
- Click on "Add Page".
- Click on the new page we just created ("Page 1" in this case) and click on "Load page" to load it.
- We chose the "Internal" source.
- To assign the texture we made previously, click on "None" in the "Media Texture" search bar.

8. We choose the desired texture (we can search in the bar by name to filter between textures).
9. Virtual screens have different types of transitions to change pages.
- Click on "Transitions" to display the menu.
- We chose "Screen Fade" which fits better in this type of cases.
